16 March 2023

Vegan & Gluten-free Pumpkin Scones 🎃


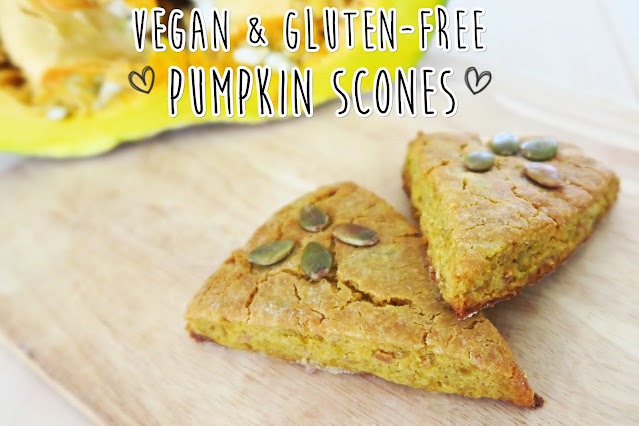
One of my proudest achievements this year has been growing my own vegetables especially this pumpkin so I wanted to put it to good use and make something special so decided to try baking some pumpkin scones as pumpkin scones are one of my favourite seasonal snacks from Starbucks.


It has been a while since I made scones and because I wanted to make it suitable for all diets to enjoy it took me a few attempts to get this recipe right but the end result is vegan, gluten-free, oil-free, and in my opinion even better and more delicious and healthy than the ones I used to get at Starbucks.


For this recipe I steamed and mashed the pumpkin to make my own pumpkin puree but you can use pumpkin puree from a can to save time, also be sure to put your can of coconut milk in the fridge overnight as it will make the dough easier to work with and create a better crumb.

Ingredients

Dry
  • 1 cup gluten-free flour mix
  • 1 tbsp coconut flour
  • 1 tbsp ground flax seeds
  • 1 tsp baking powder

Wet
  • 1 cup pumpkin puree
  • 1/3 cup sugar
  • 1/3 cup chilled coconut milk
  • 2 tbsp maple syrup
  • 1 tsp ground cinnamon
  • 1/2 tsp apple cider vinegar

Step 1 - Mix the dry ingredients
In a large bowl measure out and mix all the dry ingredients together until combined.

Step 2 - Mix the wet ingredients
In a separate bowl measure out and mix all the wet ingredients together until well combined.

Step 3 - Mix all together
Gradually add in the wet ingredients into the dry until a soft sticky dough has formed.

Step 4 - Chill
Put the dough in the fridge to rest for an hour.

Step 5 - Heat the oven
While the dough is resting preheat an oven to 200°C and line and grease a baking tray with parchment paper.

Step 6 - Shape the dough
On a clean flat surface sprinkle some flour and then press the dough out in a circle until it's an even 2 - 3cm thick, cut the dough into half, quarters and then eight pieces then place each piece on the lined baking tray.

Step 7 - Bake
Place the scones in the oven to bake for 15 - 20 minutes until golden brown and the tips begin to crisp.

Step 8 - Cool
Once cooked remove the scones from the oven and allow to cool before eating

Step 9 - Eat & Enjoy!
You can eat these scones alone or served with a delicious hot cup of coffee or tea.


Be sure to tag me on Instagram if you make it
Love & Hugs
Cate
xoxo


If you like what you see and want to see more can support me by clicking the button below


05 January 2023

Vegan Eggless Egg Sandwich 🥪


The colder mornings here in the mountains of Northern Thailand have got me craving some hearty warm breakfasts. Lately I've been seeing a lot of delicious looking egg sandwiches on my Instagram feed so I decided to try and create my own breakfast eggless egg sandwich using some homemade tofu from my local market.


The main ingredient of this sandwich is the tofu scramble which is really easy and simple to make and fully customisable to you tastes so feel free to add in your own herbs and spices and extra veggies. I added some vegan mayonnaise and avocado to my sandwich which gave the scramble an extra creaminess but feel free to use your own sauces like ketchup, BBQ or Sriracha sauce for an extra kick.

 
You can use whatever bread you want for this recipe, I just toasted some regular sandwich bread I had left but this works great with sourdough, in a baguette, bagel or even a croissant, it makes a really great breakfast, hearty but not heavy, perfect to give you an energy and a mood boost on cold day.

Ingredients
  • 100g firm tofu
  • 1 tbsp nutritional yeast
  • 1 tbsp soy milk
  • 1/2 tsp smoked paprika
  • Salt & pepper to taste
  • 1 tbsp olive oil
  • 3 small cloves of garlic
  • 2 medium sized tomatoes
  • A handful of button mushrooms
  • Cilantro to garnish

Step 1 - Prepare the tofu
Crumble the tofu into a bowl and mix in the nutritional yeast, soy milk, smoked paprika and salt and pepper.

Step 2  - Prepare the vegetables
Dice the garlic and tomatoes and slice the mushrooms into small pieces, chop the cilantro and leave to one side for garnish

Step 3 - Cook
Heat the olive oil in a frying pan on a medium high heat and add the garlic, once that garlic is slightly crispy add in the tomatoes, mushroom and tofu crumble mix, you don't need to cook it for too long, just until the vegetables are softened and the tofu is warmed through. Once cooked sprinkle on the cilantro and it's ready to go.

Step 4 - Sandwich time!!
There should be enough of the tofu scramble for 2 - 3 sandwiches depending on how big you want to make them OR you can just serve the tofu scramble on its own as is.


Happy New Year
Be sure to tag me on Instagram if you make it
Love & Hugs
Cate
xoxo


If you like what you see and want to see more can support me by clicking the button below


21 December 2022

Vegan & Gluten-free Soda Bread 🍞


The perfect compliment to my vegan cream cheese recipe is this vegan and gluten-free soda bread. During lockdown when I was unable to go to a bakery I used to make soda bread all the time as the ingredients are so simple, easily available and it's really quick to make unlike regular bread which requires yeast and a lot of kneading and time proving, this bread however can be done in less than 30 minutes!

-----

Soda bread has a much denser texture compared to regular bread and making a gluten-free version I expected to be challenging but whilst still being being dense compared to regular yeasted bread I found this version to be softer and lighter than my regular soda bread and I actually prefer it much more so this is the recipe I decided to share.


Most of the bread widely available in Thailand contains milk and has a sweet taste which I'm not a fan of so this is a nice easy, quick alternative for me to make at home and to level it up you can also add in some herbs and spices, I often chop up some rosemary from my garden and throw it into the mix which gives it a great fragrance and taste.

Ingredients
  • 3/4 cup Rice flour
  • 1/4 cup Coconut flour
  • 1/2 tsp Baking powder
  • 1/2 tsp Baking soda
  • 1 cup Oat milk
  • 1 tbsp Apple cider vinegar
  • 1 tbsp Ground flax seed
  • 3 tbsp Water

Step 1 - Preheat an oven to 220°C
Prepare a small baking tin by greasing it with a little oil and line the bottom with some baking paper.

Step 2 - Make the buttermilk
Mix together the oat milk and apple cider vinegar in measuring jug and leave to curdle for 5 - 10 minutes.

Step 3 - Make a flax egg
To make a flax egg mix together the ground flax seeds and water in a small dish or glass and leave to stand for a few minutes so the mixture gets thicker and more gel like in consistency.

Step 4 - Mix together the dry ingredients 
In a mixing bowl mix together the rice flour, coconut flour, baking soda and baking powder.

Step 5 - Add in the wet ingredients
To the flour add in the flax egg and buttermilk mixtures and mix until well combined, the mixture should come together and look like a wet dough.

Step 6 - Shape the Loaf
Shape the dough into a round ball which is about 1" - 1.5" thick and place into a baking tin and score the top with a cross about half and inch deep.

Step 7 - Bake in a oven
Place the bread into the center of a pre-heated oven and bake for 15 - 20 minutes until the top has a golden brown crust.

Step 8 - Let it cool
Once cooked take the soda bread out of the oven and let it cool for 10 - 20 minutes then remove it from the tin and let it cool for a little while longer before slicing and serving. Leaving it to cool will help the structure so when you cut into it it won't be too crumbly.

Step 9 - Serve and store
You can serve the soda bread sliced or toasted in the oven for a few minutes with some cream cheese, it also goes great with soups and stews. The bread will last around 3 - 5 days in an airtight box which you can leave on the counter or if you live in a warmer climate like me then you can keep it the fridge.


Happy Holidays and be sure to tag me on Instagram if you make it
Love & Hugs
Cate
xoxo


If you like what you see and want to see more can support me by clicking the button below