Showing posts with label gluten free. Show all posts

16 March 2023

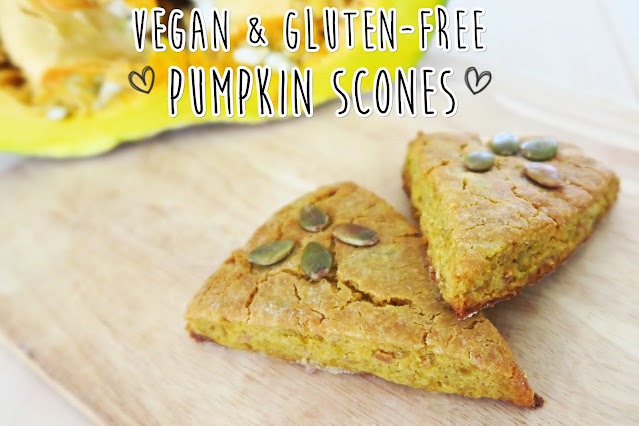
Vegan & Gluten-free Pumpkin Scones 🎃


One of my proudest achievements this year has been growing my own vegetables especially this pumpkin so I wanted to put it to good use and make something special so decided to try baking some pumpkin scones as pumpkin scones are one of my favourite seasonal snacks from Starbucks.


It has been a while since I made scones and because I wanted to make it suitable for all diets to enjoy it took me a few attempts to get this recipe right but the end result is vegan, gluten-free, oil-free, and in my opinion even better and more delicious and healthy than the ones I used to get at Starbucks.
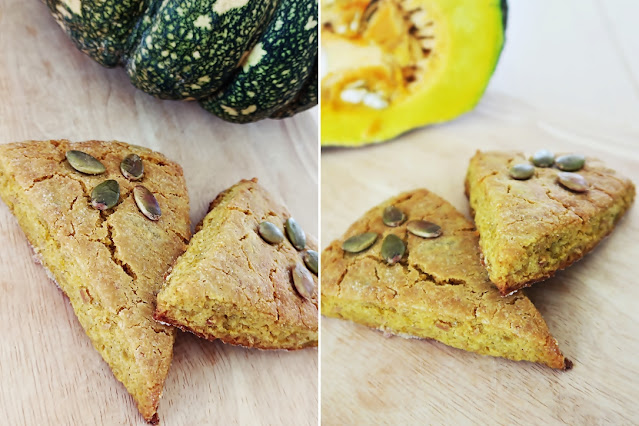

For this recipe I steamed and mashed the pumpkin to make my own pumpkin puree but you can use pumpkin puree from a can to save time, also be sure to put your can of coconut milk in the fridge overnight as it will make the dough easier to work with and create a better crumb.

Ingredients

Dry
  • 1 cup gluten-free flour mix
  • 1 tbsp coconut flour
  • 1 tbsp ground flax seeds
  • 1 tsp baking powder

Wet
  • 1 cup pumpkin puree
  • 1/3 cup sugar
  • 1/3 cup chilled coconut milk
  • 2 tbsp maple syrup
  • 1 tsp ground cinnamon
  • 1/2 tsp apple cider vinegar

Step 1 - Mix the dry ingredients
In a large bowl measure out and mix all the dry ingredients together until combined.

Step 2 - Mix the wet ingredients
In a separate bowl measure out and mix all the wet ingredients together until well combined.

Step 3 - Mix all together
Gradually add in the wet ingredients into the dry until a soft sticky dough has formed.

Step 4 - Chill
Put the dough in the fridge to rest for an hour.

Step 5 - Heat the oven
While the dough is resting preheat an oven to 200°C and line and grease a baking tray with parchment paper.

Step 6 - Shape the dough
On a clean flat surface sprinkle some flour and then press the dough out in a circle until it's an even 2 - 3cm thick, cut the dough into half, quarters and then eight pieces then place each piece on the lined baking tray.

Step 7 - Bake
Place the scones in the oven to bake for 15 - 20 minutes until golden brown and the tips begin to crisp.

Step 8 - Cool
Once cooked remove the scones from the oven and allow to cool before eating

Step 9 - Eat & Enjoy!
You can eat these scones alone or served with a delicious hot cup of coffee or tea.


Be sure to tag me on Instagram if you make it
Love & Hugs
Cate
xoxo


If you like what you see and want to see more can support me by clicking the button below


05 January 2023

Vegan Eggless Egg Sandwich 🥪


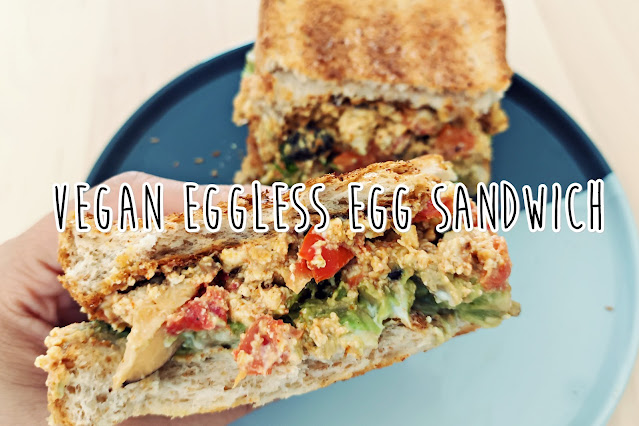
The colder mornings here in the mountains of Northern Thailand have got me craving some hearty warm breakfasts. Lately I've been seeing a lot of delicious looking egg sandwiches on my Instagram feed so I decided to try and create my own breakfast eggless egg sandwich using some homemade tofu from my local market.


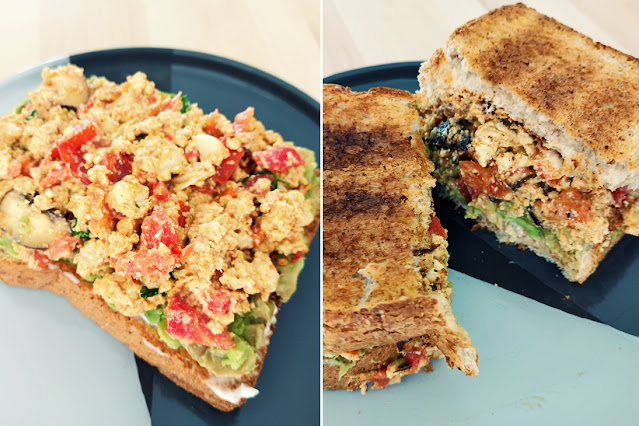
The main ingredient of this sandwich is the tofu scramble which is really easy and simple to make and fully customisable to you tastes so feel free to add in your own herbs and spices and extra veggies. I added some vegan mayonnaise and avocado to my sandwich which gave the scramble an extra creaminess but feel free to use your own sauces like ketchup, BBQ or Sriracha sauce for an extra kick.

 
You can use whatever bread you want for this recipe, I just toasted some regular sandwich bread I had left but this works great with sourdough, in a baguette, bagel or even a croissant, it makes a really great breakfast, hearty but not heavy, perfect to give you an energy and a mood boost on cold day.

Ingredients
  • 100g firm tofu
  • 1 tbsp nutritional yeast
  • 1 tbsp soy milk
  • 1/2 tsp smoked paprika
  • Salt & pepper to taste
  • 1 tbsp olive oil
  • 3 small cloves of garlic
  • 2 medium sized tomatoes
  • A handful of button mushrooms
  • Cilantro to garnish

Step 1 - Prepare the tofu
Crumble the tofu into a bowl and mix in the nutritional yeast, soy milk, smoked paprika and salt and pepper.

Step 2  - Prepare the vegetables
Dice the garlic and tomatoes and slice the mushrooms into small pieces, chop the cilantro and leave to one side for garnish

Step 3 - Cook
Heat the olive oil in a frying pan on a medium high heat and add the garlic, once that garlic is slightly crispy add in the tomatoes, mushroom and tofu crumble mix, you don't need to cook it for too long, just until the vegetables are softened and the tofu is warmed through. Once cooked sprinkle on the cilantro and it's ready to go.

Step 4 - Sandwich time!!
There should be enough of the tofu scramble for 2 - 3 sandwiches depending on how big you want to make them OR you can just serve the tofu scramble on its own as is.


Happy New Year
Be sure to tag me on Instagram if you make it
Love & Hugs
Cate
xoxo


If you like what you see and want to see more can support me by clicking the button below


21 December 2022

Vegan & Gluten-free Soda Bread 🍞


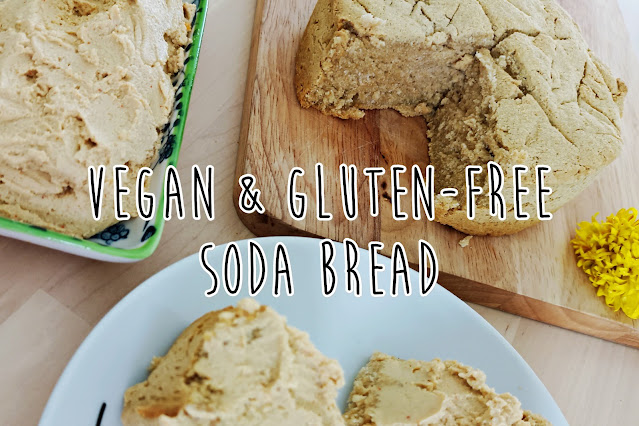
The perfect compliment to my vegan cream cheese recipe is this vegan and gluten-free soda bread. During lockdown when I was unable to go to a bakery I used to make soda bread all the time as the ingredients are so simple, easily available and it's really quick to make unlike regular bread which requires yeast and a lot of kneading and time proving, this bread however can be done in less than 30 minutes!

-----

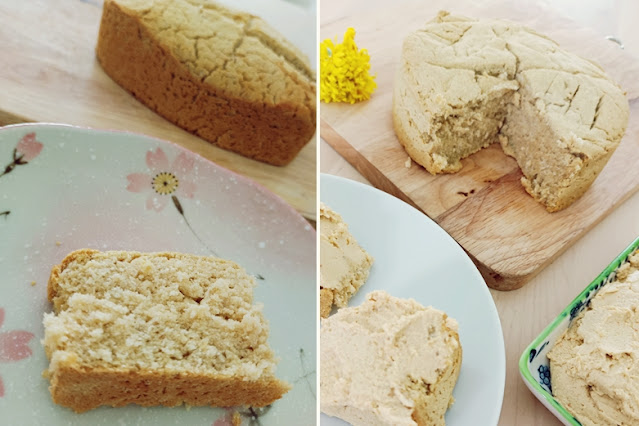
Soda bread has a much denser texture compared to regular bread and making a gluten-free version I expected to be challenging but whilst still being being dense compared to regular yeasted bread I found this version to be softer and lighter than my regular soda bread and I actually prefer it much more so this is the recipe I decided to share.


Most of the bread widely available in Thailand contains milk and has a sweet taste which I'm not a fan of so this is a nice easy, quick alternative for me to make at home and to level it up you can also add in some herbs and spices, I often chop up some rosemary from my garden and throw it into the mix which gives it a great fragrance and taste.

Ingredients
  • 3/4 cup Rice flour
  • 1/4 cup Coconut flour
  • 1/2 tsp Baking powder
  • 1/2 tsp Baking soda
  • 1 cup Oat milk
  • 1 tbsp Apple cider vinegar
  • 1 tbsp Ground flax seed
  • 3 tbsp Water

Step 1 - Preheat an oven to 220°C
Prepare a small baking tin by greasing it with a little oil and line the bottom with some baking paper.

Step 2 - Make the buttermilk
Mix together the oat milk and apple cider vinegar in measuring jug and leave to curdle for 5 - 10 minutes.

Step 3 - Make a flax egg
To make a flax egg mix together the ground flax seeds and water in a small dish or glass and leave to stand for a few minutes so the mixture gets thicker and more gel like in consistency.

Step 4 - Mix together the dry ingredients 
In a mixing bowl mix together the rice flour, coconut flour, baking soda and baking powder.

Step 5 - Add in the wet ingredients
To the flour add in the flax egg and buttermilk mixtures and mix until well combined, the mixture should come together and look like a wet dough.

Step 6 - Shape the Loaf
Shape the dough into a round ball which is about 1" - 1.5" thick and place into a baking tin and score the top with a cross about half and inch deep.

Step 7 - Bake in a oven
Place the bread into the center of a pre-heated oven and bake for 15 - 20 minutes until the top has a golden brown crust.

Step 8 - Let it cool
Once cooked take the soda bread out of the oven and let it cool for 10 - 20 minutes then remove it from the tin and let it cool for a little while longer before slicing and serving. Leaving it to cool will help the structure so when you cut into it it won't be too crumbly.

Step 9 - Serve and store
You can serve the soda bread sliced or toasted in the oven for a few minutes with some cream cheese, it also goes great with soups and stews. The bread will last around 3 - 5 days in an airtight box which you can leave on the counter or if you live in a warmer climate like me then you can keep it the fridge.


Happy Holidays and be sure to tag me on Instagram if you make it
Love & Hugs
Cate
xoxo


If you like what you see and want to see more can support me by clicking the button below


08 December 2022

Super Easy Vegan Cream Cheese 🧀


Christmas is coming and there's nothing like a cheese board to get you in the mood for the season however if like me your stomach suffers when overloaded with dairy and you don't want to spend all day running to the toilet this dairy-free vegan cream cheese alternative is quick and easy to make and tastes just as good, if not better than the real thing.


Consider this recipe is a base with which you can add all sorts of flavours to. I love adding some smoked paprika into the mix and have also tried it with roasted garlic and rosemary. So feel free to add in some of your own herbs and spices and even some dried cranberries, a dash of brandy and some orange zest for a more festive flavour. 


The best thing about this is that it's super simple and really quick to make you just need a blender and that's it! I always thought vegan cheeses were difficult to make but this is a really easy substitute for when you have those cheese cravings and the ingredients are really simple and easily available. I honestly prefer this over a lot of the cream cheeses I used to eat and as a bonus it's much healthier for your than the regular dairy cream cheese.

Ingredients
  • 170g Firm tofu
  • 4 Tbsp Nutritional yeast
  • 1 Tbsp Olive oil
  • 2 Tbsp Apple Cider Vinegar
  • 1 Tsp Miso paste
  • 2 Tbsp unsweetened soy milk (if you want a thicker cheese you can omit this)
  • Salt & Pepper to your taste

Step 1 - Blend
In a blender add all of the ingredients and blend until smooth. I recommend that you also give it a taste at this point and if you need to you can adjust the taste to your liking.

Step 2 - Chill
Scrape the mixture out of the blender and put it in a airtight box to chill for a couple hours in the fridge. You can serve straight from the blender but I think the texture and taste is much better after it's chilled for a little while.

Step 3 - Serve
Once the cream cheese has chilled it's ready to eat so just spread it on some toast and enjoy and it should last 3 - 5 days in an airtight box in the fridge depending on how fresh your tofu is.

Happy Holidays and be sure to tag me on Instagram if you make it
Love & Hugs
Cate
xoxo


If you like what you see and want to see more can support me by clicking the button below


03 December 2022

Vegan & Gluten-free Welsh Bara Brith 🎄


Bara Brith always reminds me of Christmas. It was one of the first things I learned how to bake and every Christmas my auntie would gift us a loaf along with her homegrown, homemade apple chutney. This year I wanted to bring a little bit of that Welsh Christmas spirit into my new house in Chiang Mai and create a version that was both vegan and gluten-free so everyone could enjoy it.


If you've never had Bara Brith before it's similar to a fruit loaf but what makes it special is that the fruit is soaked in tea giving the loaf a nice tea flavour. It's the perfect Christmas cake alternative if you don't like a heavy dense fruit cake or strong spices and it goes nicely with a warm cider or hot eggnog.


As the main ingredients of Bara Brith are eggs and flour it was a bit of a challenge to make this both vegan and gluten-free and get the texture right but after a few failed attempts I'm finally happy enough with the results to share my recipe in time for Christmas.


Ingredients
  • 100g Dried mixed fruit
  • 70g Brown sugar
  • 100ml Hot water
  • 1 Tea bag (Yorkshire Tea is my favourite but any breakfast or black tea will work)
  • 100g Gluten-free flour mix
  • 30g Riceberry flour 
  • 70g Unsweetened applesauce
  • 1/2 tbsp Ground flax seeds
  • 1 tsp Baking Powder
  • 1/4 tsp Cinnamon powder

Step 1 - Soak the fruit
The first thing to do is make a very strong tea brew, I usually let the tea bag soak in boiling water for about 5 minutes and then give the tea bag a good squeeze to get all the flavour out. After the tea is brewed add 100ml of the hot tea into the dried mixed fruit and brown sugar, give it a stir to help the sugar dissolve, and leave it to soak overnight. 

Step 2 - Preheat an oven to 180°C
Prepare a 6" loaf tin by greasing it with a little oil and line the bottom with some baking paper.

Step 3 - Mix the dry ingredients
In a mixing bowl mix together the flours, ground flax seed, baking powder and cinnamon

Step 4 - Add the wet ingredients
To the dry ingredients add in the tea soaked fruit and mixed until combined. There's no need to drain the fruit just add in the whole tea, fruit, sugar mix.

Step 5 - Mix in the applesauce
Lastly fold the applesauce into the mixture until well combined.

Step 6 - Pour batter into a loaf tin
Evenly distribute the batter in the tin and then drop the tin on the kitchen counter a couple of times to make any air bubbles rise to the surface and ensure you don't get any holes in your loaf.

Step 7 - Bake in a oven
Place the loaf tin into the center of a pre-heated oven and bake for 20 - 30 minutes or until a toothpick comes out clean. If the top of the loaf is starting to look like it's burning but the loaf isn't completely cooked through yet you can cover it with tin foil on top to prevent the top from burning.

Step 8 - Let it cool
Once cooked take the Bara Brith out of the oven and let it cool for 10 - 20 minutes then remove it from the tin and let it cool for a little while longer before slicing and serving. Leaving it to cool will help the structure so when you cut into it it won't be too crumbly.

Step 9 - Serve and store
You can serve the Bara Brith sliced plain or with a bit of butter or honey and if you need to store it, it will last around 7 days in an airtight box which you can leave on the counter or if you live in a warmer climate like me then it's better to keep it the fridge.


Happy Holidays and be sure to tag me on Instagram if you make it
Love & Hugs
Cate
xoxo


If you like what you see and want to see more can support me by clicking the button below


16 March 2021

🌱 Bangkok's BEST Vegan Plant-based Restaurants 🌱


I've been eating really well these days with all the amazing plant-based vegan choices available in Thailand, the vegan movement is getting so popular here that this month Bangkok's first vegan supermarket opened in Iconsiam one of the biggest malls not just Thailand but the whole of Asia so I will definitely be visiting it soon but in the meantime here are a few more of my favourite vegan restaurants in Bangkok I've been eating at recently.


Broccoli Revolution is one of the vegan restaurants I visit quite often as they have a few different branches around Bangkok, their food is always fresh and colourful and I love that they put an emphasis on using more local fresh fruits and vegetable. My absolute favourite is their veggie burger which comes in a charcoal bun and is made of lots of veggies and served with salsa and guacamole, it's so delicious and light yet filling to and it comes with their homemade fries which are just as delicious, I'm not the biggest fan of mock meats and prefer my plant-based food to be more fruits and vegetable based and Broccoli Revolution does just that with a menu full of fresh fruits and vegetables from pizzas and burgers to sushi and salad bowls , I definitely recommend you check them out!


Speaking of restaurants who use more vegetables instead of mock meats there's Nature's Charm. Their restaurant is one of the cutest in Bangkok with a pink and floral aesthetic and they make the best desserts, you wouldn't even be able to tell that their macarons are completely vegan as they taste even better than the ones from Ladurée and their "meat" is made completely from fruits and veggies, the chicken bites and fish is made from jackfruit but strangely looks just like actual meat and I was so confused when I first cut into their fish and chips I was so confused as it looked like actual fish but thankfully it wasn't and they did a phenomenal job as it tastes so good everyone needs to try their fish and chips!


This is a recently opened vegan café in one of my favourite spots in Emquartier. I've been buying The Banana Warrior's delicious healthy vegan banana bread for a while from farmers markets and cafes so was extremely excited to try her savoury food and it did not disappoint. The café is full of good vibes and I loved the little handwritten notes and I love that the menu constantly changes depending on what's available to as they source their ingredients from local organic farmers so I would recommend you go often and try whatever you can, as for the banana bread I've tried so many but the orange-gasm is my absolute favourite along with the lemon cookies that my grandma really loved, they are a must along with a cup of coffee or hot chocolate.


Be sure to follow me on Instagram to decide the next vegan restaurant I visit!
Love & Cookies
Cate
xoxo

Psssst if you want to see more amazing vegan restaurants you can support me by clicking the button below
Buy me a coffee and get a shoutout on my SNS

06 February 2016

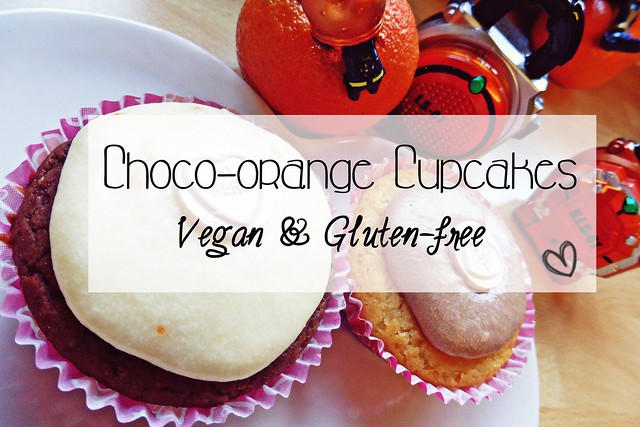
Valentine's Day Choco-Orange Cupcakes ♥ (Vegan & Gluten-free)

Choco-orange Cupcakes (Vegan & Gluten-free)>
Valentine's Day is just a week away and what better way to surprise the one you love than with some yummy homebaked treats. If you didn't already know during my holiday in Japan I got obsessed with Kamen Rider Gaim and its handsome male lead Gaku Sano and so I thought I would bake something in his honour and what could be more perfect and delicious than some choco-orange cupcakes.

Choco-orange Cupcakes (Vegan & Gluten-free)

Ingredients
  • 1 1/2 cups self raising gluten-free flour
  • 1 tsp baking powder
  • 1/2 cup brown sugar
  • 1 tablespoon orange zest
  • 1 cup orange juice
  • 1/3 cup rice bran oil
  • 1 tbsp apple cider vinegar
  • 1 tsp vanilla extract
  • 1 tbsp cacao powder
For the frosting...
  • 1/4 cup dairy-free butter
  • 1 cup icing sugar
  • 1 tsp orange zest
  • 2 tsps orange juice
  • 1/2 tsp cacao powder
(Makes 12)


♥ Preheat and oven to 180 & line a cupcake tray with 12 cupcake cases

♥ In a one bowl mix together the flour, sugar, baking powder and orange zest.

♥ In another bow mix together the orange juice, oil, vinegar and vanilla.

♥ Slowly add the wet ingredients to the dry ingredients and mix it into a smooth batter.

♥ Divide the batter in half so you have two bowls and add the cacao powder into one of the batters and mix together thoroughly, if you don't want two different flavours you can omit the cacao for a plain orange cake or double it so the whole batter is chocolatey.

♥ Divide the batter equally into the cupcake cases and bake in the oven for 15 - 20 minutes.

♥ Once baked removed the cupcakes from the oven and allow them to cool on a wire rack.

♥ Mix together all the ingredients for the frosting leaving the cacao powder until last unless you want your frosting to be all chocolate in which case again double the amount or if you don't want a chocolate flavour you can leave it out altogether.

♥ Spoon about a teaspoon of the frosting onto the cupcakes, making sure the cupcakes are completely cool before frosting or the frosting will melt.

♥ Decorate with some love hearts or cute sprinkles.

♥ Eat and enjoy with your special someone ♥

Choco-orange Cupcakes (Vegan & Gluten-free)

Happy Valentine's Day
Cate
xoxo


23 June 2015

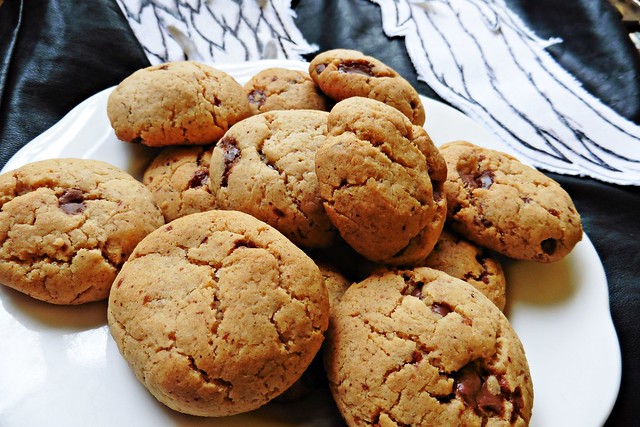
Baking Carol's Cookies from The Walking Dead (Vegan & Gluten Free)

Carol's Cookies from The Walking Dead

Hellatus has well and truly set in with all my fave TV shows ending and I'm torn between binge watching previous seasons, watching something new or just trying to do something more productive with my life than sitting in front of a TV expressing all my feels so what better way to spend my time than some fandom cooking...


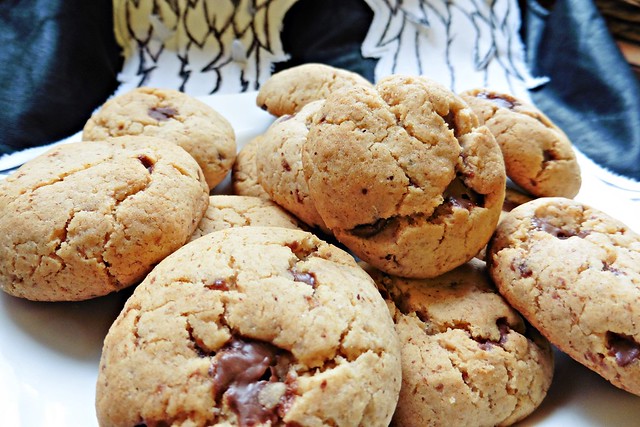
I made a few little changes to Carol's recipe to cater to my diet by using almond/coconut butter instead of shortening, gluten free flour and vegan chocolate chips all of which I'm guessing would be easily pilfered from your local health food store (or Costco) during a zombie apocalypse.

Carol's Cookies from The Walking Dead

These cookies were delicious and I did what anyone would do and ate the whole damn plate in one night, I get why that kid is so damn obsessed with these cookies now and I think I love Carol a little bit more I mean anyone who can bake cookies during a zombie apocalypse is someone I want on my team!

What would be your must have treat during a zombie apocalypse?
Love & Cookies
Cate
xoxo

06 May 2015

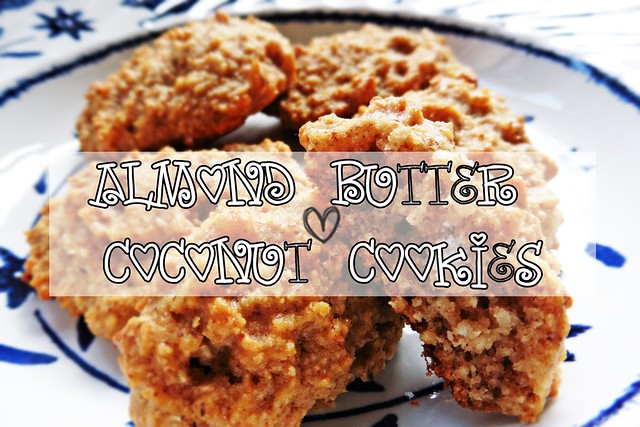
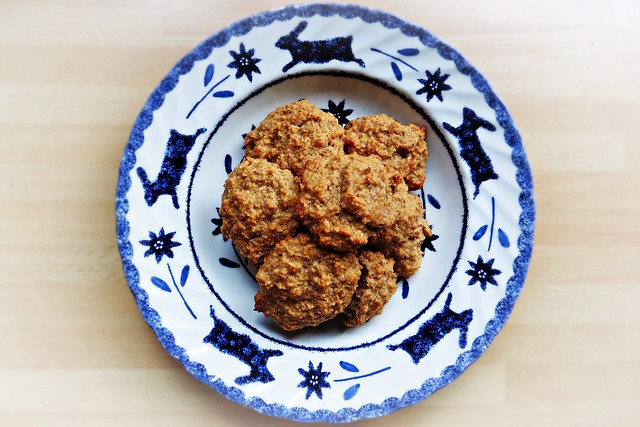
Almond Butter & Coconut Cookies (Gluten Free)

Almond Butter & Coconut Cookies

Almond butter is awesome, being someone who can't stand peanut butter I didn't quite exect to love almond butter as much as I do and you can make the best cookies with it. I'm trying to clear out my store cupboards for the summer so I can get some epic cleaning done and so I thought I'd test out this recipe and use up the last of my coconut flour which in all honestly is the most frustrating flour to cook with so I'm glad to get rid of, but these cookies came out great and were so delicious that even my dog decided to steal one!

Almond Butter & Coconut Cookies

Ingredients
  • 1/3 cup almond butter
  • 1 egg (for vegans use a flax/chia egg)
  • 1tsp vanilla extract
  • 1/4 cup almond milk
  • 1/4 cup maple syrup
  • 1/2 cup dessicated coconut
  • 1 cup coconut flour
  • 1/4 tsp baking soda
(makes 18)


♥ Preheat an oven to 180°c

♥ In a small bowl mix together the almond butter, egg, vanilla, almond milk and maple syrup until it resembles a smooth batter.

♥ Add in all the remaining ingredients and mix until thoroughly combined.

♥ Using a teaspoon spoon the dough onto a greaseproof paper lined baking tray, make sure to flatten the dough a little so they cook evenly and that they have a bit of room between them to expand and rise.

♥ Place the cookies in the oven and cook for 8 - 10 minutes until the cookies are golden in colour.

♥ Remove the tray from the over and allow to cool for 5 - 10 mins. then remove the cookies and let them cool completely on a wire rack.

♥ Eat on their own or with a refreshing hot beverage.

Good Luck
Cate
xoxo

20 January 2015

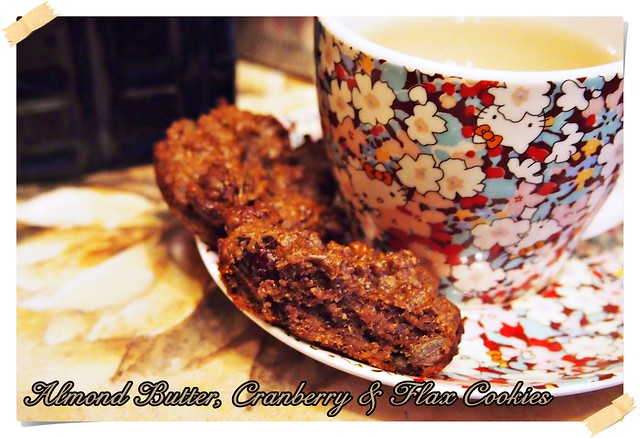
Almond Butter, Cranberry & Flax Cookies (Vegan & Gluten Free)

Almond Butter, Cranberry & Flax Cookies (Vegan & Gluten Free)
2015 has begun and it's time for me to quit with the junk food and get back on the health train. After starting the year feeling all sick and ill I need to get some goodness back into my body but I'm not giving up on my cookies just yet, I mean what am I supposed to have with my cup of tea? These cookies are vegan, gluten free and super easy to make, it's taken me a while to make the perfect almond butter cookie as most seem to come out too dry but these were nice and chewy, I'll definitely be making another batch of these soon!

Ingredients
  • 2/3 cup ground flax seeds
  • 1/2 cup almond butter
  • 1/3 cup maple syrup
  • 1/3 cup almond milk
  • 1/3 cup dried cranberries
  • 1/3 cup pumpkin seeds
  • 1 tsp cinnamon
(Makes 12)

♥ Preheat an oven to 180°c and grease a 12 pan cupcake tray.

♥ Mix together all the ingredients until thoroughly combined.

♥ Divide the mixture into equal parts and place into the previously greased cupcake tray.

♥ Bake in preheated oven for 20 minutes or until the edges are slightly browned.

♥ Let the cookies cool in the pan for 5 minutes, then transfer to a rack to cool.

♥ Eat & Enjoy!

Good Luck
Cate
xoxo

09 November 2014

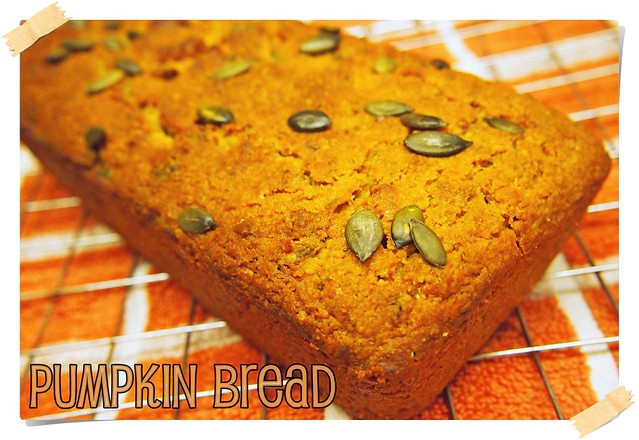
Pumpkin Bread (Vegan & Gluten Free)

Pumpkin Bread
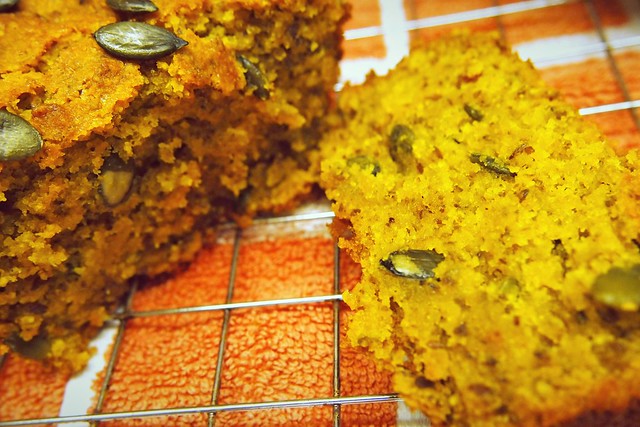
Autumn is turning into winter but I've still got a taste for all things pumpkin. My current favourite night-time treat has to be curing up on the sofa in a warm blanket with a cup of coffee and a slice of this, I've made this bread twice already this month as even my pumpkin hating friends were asking for seconds so here's the recipe and let's spread some pumpkin love.

Pumpkin Bread

Ingredients
  • 1 cup gluten free flour
  • 1 cup coconut flour
  • 1 cup brown sugar
  • 1 tsp baking powder
  • 1/2 tsp pumpkin spice
  • 1/3 cup ground flax seed
  • 1/3 cup pumpkin seeds
  • 1 tsp vanilla extract
  • 1 cup pumpkin purée
  • 1/4 cup maple syrup
  • 1/2 cup oil
  • 1/2 cup coconut milk
♥  Preheat an oven to 180 then grease and line a loaf tin.

♥  In a bow mix together all the dry ingredients (flour, sugar, baking powder, flax seed & spice)

♥  Then add in the pumpkin purée, vanilla extract, syrup, oil and coconut milk and mix throughly.

♥  Once all the ingredients are mixed fold in the pumpkin seeds, if you want put a few to the side to sprinkle on top before baking.

♥  Spoon the batter evenly into the loaf tin & sprinkle a few pumpkin seeds on top.

♥  Place the loaf tin into the center of the oven and bake for 45 minutes until golden brown.

♥  Serve warm with a nice cuppa tea

Be sure to leave a comment if you bake it I'd love to know what you think
Good Luck
Cate
xoxo

28 October 2014

Pumpkin Spice Ginger Cookies (Vegan & Gluten Free)

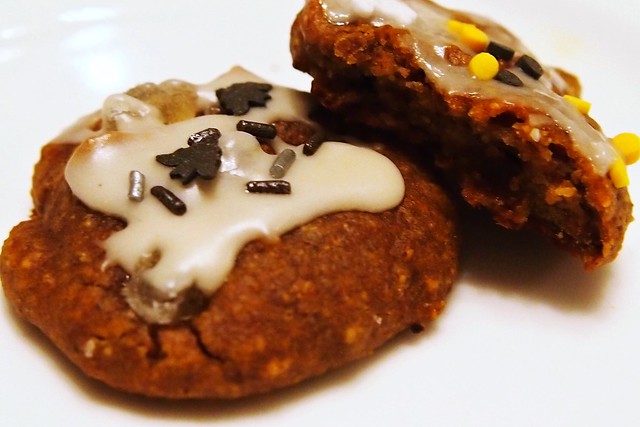
Pumpkin Spice Ginger Cookies

Autumn is here AKA the season of pumpkin spice so I thought what better way to celebrate than to do some baking. I've never actually baked with pumpkin before, canned pumpkin in not a thing you find here so I ended up making my own pumpkin puree and I had a lot of it so there will be more pumpkin recipes coming before Autumn is over.

Pumpkin Spice Ginger Cookies

Ingredients
  • 1 cup almond butter
  • 1/2 cup pumpkin puree
  • 1/4 cup maple syrup
  • 1 tsp vanilla extract
  • 1 teaspoon pumpkin spice
  • 2 tbsp ground flaxseed
  • 1/2 cup candied ginger
(Makes 20-24)

♥ Preheat an oven to 180°c

♥ Mix all the ingredients apart from the candied ginger together to form a smooth batter.

♥ Once the batter is mixed and smooth fold in the candied ginger

♥ Line a baking tray with parchment paper

♥ Spoon equal tablespooned sized amounts of the batter onto the parchment paper so they they resemble cookies, as the mixture doesn't rise too much what you put in the oven will pretty much look the same once baked.

♥ Bake the cookies for around 20 minutes for a soft texture but if you want your cookies a bit harder then leave them in for a further 5 minutes.

♥ Once baked remove from the over and carefully using a spatular remove the cookies from the parchment paper and place on a wire rack to cool

♥ Ice and decorate with "Spooky Sprinkles" for that extra Halloween touch

♥ Serve with your autumn beverage of choice and enjoy!


Only a few days left to enter my Halloween giveaway so go check it out!
Good Luck
Cate
xoxo


25 July 2014

Banana, Maple, Walnut Muffins (Vegan & Gluten Free)

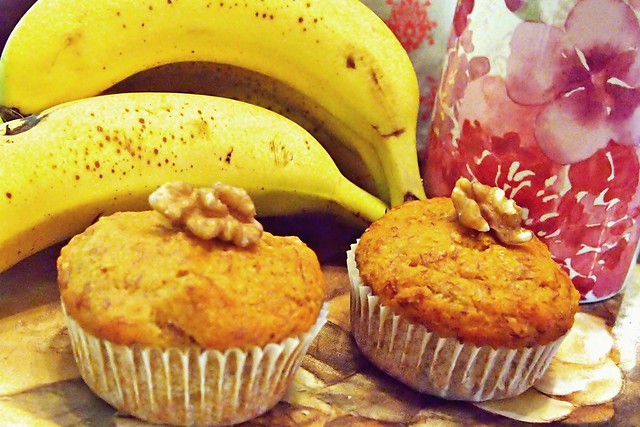
Banana, Maple, Walnut Muffins (Vegan & Gluten Free)

Before I left for Thailand I had a few things left in my cupboard that I wanted to use up, namely a bag of walnuts and some maple syrup, so I decided to bake some muffins for the family to enjoy whilst I'm away. I love experimenting with flavour combinations and maple and banana is a most deliciously heavenly match and as I wanted to cater to everyone's dietary needs I decided to keep the recipe simple, vegan and gluten-free.

Banana, Maple, Walnut Muffins (Vegan & Gluten Free)

Ingredients
  • 3 mashed bananas
  • 1 cup self-raising gluten free flour
  • ½ cup maple syrup
  • ½ brown sugar
  • 4 tbsp oil
  • ½ cup coconut flour
  • 1 cup chopped walnuts
  • 1 tsp baking powder

♥ Preheat an oven to 180°c and line a muffin tin with 12 - 15 cases.

♥ Mix together the banana, maple syrup, sugar oil and baking powder

♥ Add the coconut and gluten free flour until thoroughly mixed then fold in the walnuts.

♥ Divide the batter into the muffin cases.

♥ Bake in the oven for 20 minutes until golden brown.

♥ Once baked remove from the oven and place on a wire rack to cool before serving.

♥ Eat and enjoy!

Good Luck
Cate
xoxo

28 May 2014

Cherry Jam Cake (Vegan & Gluten Free)


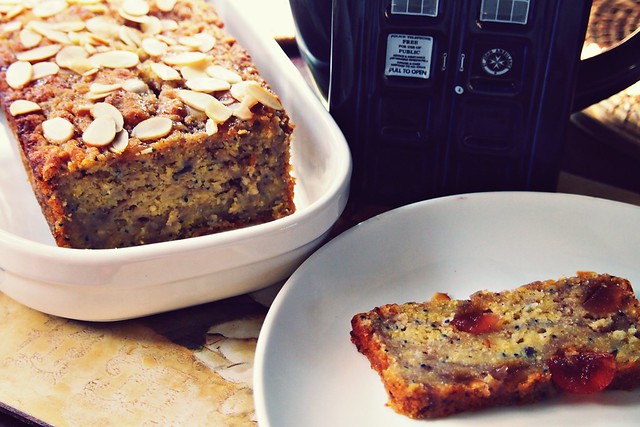
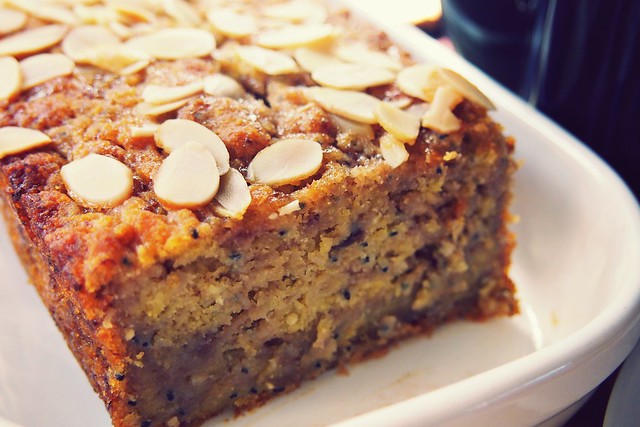
Baking for my Mum is always fun as I get to test out my dairy-free, gluten-free baking skills. Earlier this year she gifted me with a bag of coconut flour so I thought I would treat her with delicious loaf cake using her favourite additions of jam, cherries and almonds. One of my main issues with gluten-free baking is that it often comes out a bit dry but the addition of jam and banana really helped give it a nice moist texture. The most important thing though was that my Mum liked it and judging by the speed it was devoured I think I can call this a baking success!


Ingredients
  • 1 cup coconut flour
  • 1 cup self-raising gluten free flour
  • 1 cup jam
  • 1 small mashed banana
  • 1/2 cup halved glacé cherries
  • 1/2 cup almond milk
  • 1/4 cup carotino oil 
  • 1 tsp baking powder
  • 1 tbsp chia seeds & 1 cup of water
  • Almond flakes

♥ Preheat an oven to 180°c then grease and line a loaf tin.

♥ Place the chia seeds in a bowl with one cup of water and allow to soak for 5 - 10 minutes until the seeds have swelled and the water has been absorbed.

♥ In another bowl mix together the flours and baking powder then mix in the oil, almond milk, mashed banana and soaked chia seeds until combined.

♥ Fold in the cherries and jam but try not to overmix so you get a swirled effect throughout the batter.

♥ Pour the batter into the loaf tin and sprinkle some flaked almonds on top

♥ Bake in the oven for 30 - 40 minuted until golden brown.

♥ Once baked remove from the oven and place on a wire rack to cool before serving.

♥ Serve with tea and enjoy!

Good Luck
Cate
xoxo

26 April 2014

Quick & Easy Gluten Free, Dairy Free Pizza


Pizza is the best, I think it's one of my favourite foods although probably not the healthiest so I thought I would try my best at making a healthy version. I guarantee you can make this pizza from scratch in the same time it would take you to get one delivered and best of all it's suitable for those of you who are vegans, vegetarians or suffer from wheat or gluten allergies, don't worry people I got all pizza bases covered!


I've tried quite a few difference recipes for pizza bases but surprisingly this roti recipe works & tastes the best, it's super quick, easy to do and best of all yeast, wheat and dairy free.

Pizza Base
  • 1 cup gluten free flour
  • 1/4 tsp xantham gum
  • 1/4 tsp baking powder
  • 1/4 tsp salt
  • 1 tbsp olive oil
  • 1/3 cup water
♥ Mix the flour, xantham gum, baking powder and salt in a bow then add the oil

♥ Slowly add the water to the mixture until you have a solid ball of dough, if the mix is too dry feel free to add a little more water.

♥ Let the dough rest for 10 minutes

♥ Divide the mixture into two and roll out the dough into 6 - 8 inch bases.

♥ Brush oil on each side of the dough and cook in frying pan on a medium heat until it bubbles then flip it over and cook the other side.

♥ Repeat with the other base & you're done!


The sauce is what makes a pizza awesome so I wanted to pack as much flavour into it as I could. Pesto is full of flavour, quick and easy to make all you need to do are gather your ingredients, throw them in a blender and blitz them into a smooth paste, no cooking required!

Sundried Tomato Pesto
5 sundried tomatoes*
1 tbsp pine nuts
1 garlic clove
1 tsp lemon juice
1 tsp mixed herbs
Salt & pepper to season

Once you've got your base and you sauce done you just need to add the toppings, I crammed a bunch of fresh veggies on mine which I cooked separately and some avocado to give it a hint of creaminess in place of cheese. You can add whatever toppings you want, the possibilities are endless and once your toppings are on you can eat right away or put in an oven to cook for a few minutes, quick, easy and fresh!

Good Luck
Cate
xoxo


*Try to use the sundried tomatoes in oil if you can but if not just add a tablespoon of olive oil to the mixture

21 March 2014

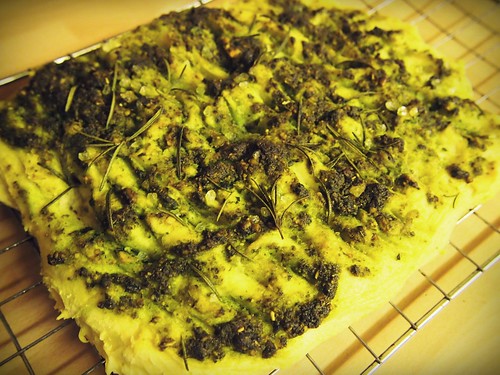
Gluten Free Rosemary, Sea Salt & Pesto Focaccia Bread


As I've become more healthy in my diet I find myself buying less and less pre-made foods and ready meals, I used to buy soup quite frequently but now I prefer to make my own as I like knowing exactly what and where my ingredients come from, but I thought I would kick it up a notch this year and break out of my comfort cooking zone and try a few more challenging recipes.


Bread is something that I've wanted to make for the longest time however I recently discovered I have a mild intolerance to wheat. So after a few frustrating weeks of eyeing the fancy focacias at the bakery I decided to hell with it I'll make my own, bought some gluten free flour, scoured the internet for instructions and finally went with this simple recipe changing it only slightly to have a pesto rosemary topping (which I also made from scratch) instead of mixing it into the loaf.


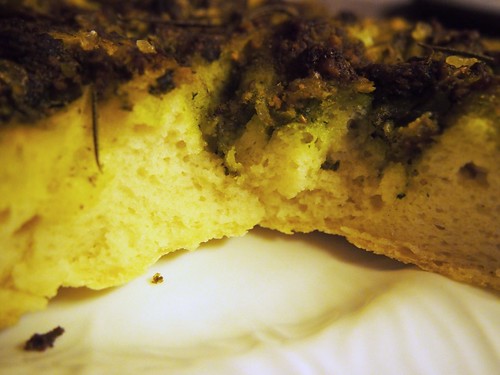
It took me nearly all day to make with all the proving the dough had to do (I passed the time by having another Game of Thrones marathon) but it was totally worth it because my first attempt actually came out pretty damn good! It was spongy, crunchy and the pesto topping gave it a great flavour, I'm not sure I'll be making it regularly as it was so time consuming but it's definitely something I'd treat myself to on a special occasion.

Don't forget to enter my giveaway to win yourself some awesome beauty treats!
Small Victories & Pesto
Cate
xoxo


03 March 2012

Mini Blueberry Sponge Cakes


One of my goals for this year was to take better care of myself, eat the right foods, exercise more and just look after my body and I have to say it's working because I feel more fitter and healthier than I have in years. I've been searching for some "healthy" cake recipes to soothe my sweet cravings and I think I've finally found the solution, with these little light sponges being only 100 calories each they are definitely a well deserved treat after a hard work-out!

Ingredients
  • 1 cup of blueberries
  • 1/2 cup of corn flour/starch
  • 1/2 cup of sugar
  • 2 large eggs
  • 1 tsp baking powder
  • 1 tbsp rice flour
  • A pinch of salt

♥ Preheat an oven to 190°c and line a muffin tin with 9 baking cases.

♥ Separate the eggs, add a pinch of salt to the whites and whip them till stiff (extra work-out points if you do this by hand!).

♥ Gradually add the sugar into the egg whites until sugar has dissolved and eggs are stiff.

♥ Add the egg yolks to the whites and mix well.

♥ Fold the rice flour, baking powder and corn flour into the mixture.

♥ Place equal amounts of blueberries into each of the baking cases then spoon the sponge mixture onto them

♥ Put into the oven to bake for approximately 20 minutes till lightly browned and springy to the touch

♥ Once cooked allow to cool for a while until you're ready to dig in and enjoy!

Eat & Enjoy!
Cate
xoxo